Ever walk into a store with a design find in mind and you can't seem to source it? That often happens to me so what I do now is also look for things that I can easily modify to get the look I was hoping for. Like bookends! How to DIY Bookends to the look YOU want! I wanted some cute bookends to hold my design books but the all-white ones I found weren't cutting it for me. Materials Bookends (these were found in the depths of my basement but any object would do) Fusion Mineral Paint Fusion Decoupage & Transfer Gel Craft Brushes (I always like getting ones in different sizes) Scrapbook Paper Scissors Start Prepping and Get Painting! These little guys are ceramic and they were a little dinged up from being hidden in our basement so I gave them a quick ... [ Read More ]
What my Home REALLY looks like on a Regular Basis!
In an era of social media with its perfect pictures along with a perfectly curated image, it's hard not to fall into the trap of feeling less than perfect. Even I fall into that rabbit hole of feeling like my home is not organized enough, styled enough, or pretty enough and I know what goes on behind blogger scenes! So today I'm here to tell you, no one's house is perfect! Heck, my house is NOT perfect! And here's the proof! Let's Dive in, shall we? Our Front Entrance: Let's first take a peek at our entryway: It's small but we recently prettied-up! Here's what it looks like on a regular day: Boxes. Boxes of stuff to give to others, boxes of packages (thank you Amazon!), boxes that need to be recycled, random things that need to be put away, etc. Our Living ... [ Read More ]
Our “Back to School” Drop Zone System!
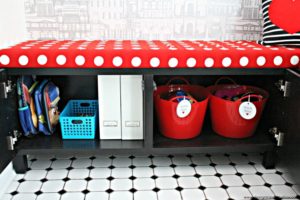
School is coming up quick for our kiddos so it's time to think of lunch prep (gah!) and organizing! We needed a back to school drop zone system quick since our current system was pretty much drop everything on the floor when you come in. Until now! Our "Back to School" Drop Zone System! Sniff. My little girl is now 4 (FOUR!!!) and she will be off to kindergarten next week. If you asked me where the time went, I have seriously no idea!! But I have been enjoying all of the back to school organizing and shopping :) Her and I have hit the town running and I think we have all of the clothes and school supplies ready but looking at our entryway that we re-did not long ago, things needed to be tweaked a bit. (Just as a refresher, this L-shaped bench was created with using IKEA's "Besta" ... [ Read More ]
My Purse Busted…and now it’s Home Decor!
You know that feeling when you find your "it" bag for the summer? The one you hoped you would find and then you walk into TJ Maxx or Winners and what you imagined miraculously was there? This bag was that for me: But after filling it waaaaaaaaay too much with stuff on a certain Haven trip, it busted. I was heartbroken. I was thisclose to throwing the purse out in my hotel room when I thought, wait, I think I can translate this loss into some sort of home decor. And I did! How to Turn a Busted Purse into Home Decor! The bag itself is a circular woven rattan bag so I thought, if I could take the handles off, I could use each of the circle sides as decor. The process was easy! Get your scissors out! With anything woven, you have to be careful with what you cut, otherwise ... [ Read More ]
How to Install a DIY Pendant Light WITHOUT Hardwiring Anything!
There are rooms in my home where no electrical was placed in the ceiling. So floor lamps, table lamps, even string lights make up my lack of light in that space. But then I had a recent "a-ha!" moment when it came to pendant light fixtures. I could DIY one myself WITHOUT installing any electrical anything! (GASP!) How to Install a DIY Pendant Light Fixture WITHOUT Hardwiring Anything! This is the table top lamp fixture I found at, you guessed it, the dollar store! But you can find similar ones here and here which would work just as well for this project! The key to this whole project is that this table lamp is battery operated!!! No electrical installations required! At $4 per table lamp, I thought I'd give my idea a try! Materials Here are the materials you need for ... [ Read More ]
My Vacation Souvenir (Say “Hello” to my New Frog Friends!)
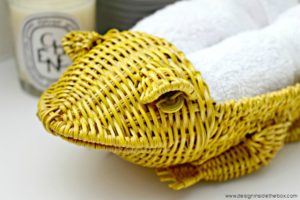
We recently went for a family trip to Williamsburg, VA and we LOVED it! Contrary to what we originally thought, there were an incredible amount of things to do, not only for our 4 year old but for adults alike! Including shopping which is always high on my agenda ;) We went to a very charming (and very LARGE) shopping complex called "Williamsburg Pottery" and this is where I met my new frog friends! They are shallow wicker baskets that cost me a whopping $0.59 each. (Is that not insane?!?!) If you know me, you know I have love for adding something unexpected (usually involving animal shaped things) in my designed spaces. So it was no surprise to anyone that I picked up 2 of these cute little frogs! The only thing I wanted to change though was their colour. So I hit our ... [ Read More ]
Easy Cabinet Hardware Makeover!
I found a product that had my head spinning with ideas on how to use it. It's one of those products that you buy, knowing you're going to use it for something and then it hits you! For me, my inspiration was our cabinet hardware. Easy Cabinet Hardware Makeover! The hardware I was looking to change has a brushed nickel finish and it's just plain boring. The Find! With that, my new find got my design juices flowing! It's metallic adhesive film which I found at the dollar store and I'm cuckoo bananas for it! (For my Canadian friends, "Dollarama" is my go-to spot.) If you can't find this product at your local dollar store, Amazon has a ton of options for a similar product! (Affiliate link provided) The Process! I've been playing around with metallic finishes in our ... [ Read More ]
Frugal Design Find: Chic Curtain Tie Backs!
It's probably of no surprise to you that I love the dollar store. And that wasn't always the case! I used to think, if it's so cheap, how could it be good?! Well folks, it's good. And it keeps getting better! While stopping in to pick up some gum and a shower pouf, I found adorable curtain tie backs that were perfect for my daughter's newly made over room. But I didn't want to commit to putting holes in the wall quite yet! So I bought some shower suction cup hooks that I modified to fit the bill. I took the daisy off and mounted the suction cup on the wall. Then I took the tie back and literally tied back the curtain, using the newly installed, temporary hook. Isn't it cute?! And so appropriate for the space. Here is one panel with the tie back and one ... [ Read More ]
How to Install Door Hardware as Hooks with the Home Depot!
Remember the space behind my daughter's door that I turned into a little dressing area? I installed hooks to hold her hat collection and a large mirror, all of which were shallow enough to tuck into that space without the door smacking into it when you opened it. But did you know that those hooks are actually inexpensive door hardware from the Home Depot? My hubby told me that part of my design mojo involves using objects in unconventional ways. And yup, he's right! I struggled to find traditional hooks that were shallow enough to install behind a door and hooks that didn't have the potential to poke a child's eye out. These babies did the trick! (And they are very budget friendly at $1 per "hook") Here's what you'll need: "Hooks" (i.e., the door hardware you ... [ Read More ]
“One Room Challenge” Spring Edition 2018 – The Details!
PHEW!!! I'm still in recovery mode from the "One Room Challenge" that just ended. Have you gone to see all of the room transformations by the way? I'm still making my way through them and they are SO GOOD!! Last week I revealed our newly made over bedroom for our little girl and I was so pleased with how it turned out. And I'm happy to report our little girl LOVES IT! But in revealing all of the goodness last week, I didn't reveal any of the details on where I picked up all of my goodies! So today I'm going to tell you everything! Let me start with my 3 favourite items in the space. First up, the bed! It looks like a daybed doesn't it? But it's really IKEA's MINNEN bed frame . The trick is that I purchased two of these bed frames and used both headboards to create this ... [ Read More ]
- « Previous Page
- 1
- 2
- 3
- 4
- 5
- …
- 8
- Next Page »
