I know what you're thinking. There are TONS of DIY pillow cover tutorials out there. But I recently had to sew six (SIX!) pillow covers for my daughter's bedroom in one evening and I discovered a few tricks along the way that will make you want to sew your own envelope pillow cover STAT! Let's do this!! Step 1 Buy your pillow form first. This will dictate how much fabric you need! I like this one from IKEA which is soft and the size is perfect for the patio chair I'm making this pillow cover for. Step 2 Purchase your fabric. For a 26" x 26" pillow form, 1 yard of fabric is plenty. Step 3 We need to cut 3 pieces out for an envelope pillow. Time Saving Tip #1 - DON'T MEASURE! Eye-balling it is sufficient! For the first piece, place your pillow form on ... [ Read More ]
DIY Chalkboard!
There's a wall in my dining room that is blank. And this wall is big. I normally don't have any problems decorating walls but with this one, I've struggled. Decorating Options! Artwork: My thought on artwork is that it would have to be something we could all enjoy. It's a tall order given that we all have different styles! (A Paw Patrol mural was out of the question). Gallery Wall: We already have one in the space that I call my "wall of mirrors". Adding another gallery wall would make the room look and feel too busy. Nothing: I considered not putting up anything on that wall. But when you're sitting down at the table, your eyes inevitably glance up at that wall and there's nothing to look at! After brainstorming a bit more, I thought a large interactive piece ... [ Read More ]
I Heart Peelable Spray Paint!
Question: Do you decorate for every season? Or do you avoid decorating said seasons because of all the single-use junk you collect afterwards? I'm in the second boat. I typically don't decorate for each season like Easter, St. Patrick's Day, etc because of all the stuff I have to store afterwards. And throwing it out or giving it away feels like a waste on so many levels. But then I found this: a peelable (yup, PEELABLE!) primer spray paint! See those little bunnies? I picked them up from (you guessed it!) the dollar store. And while they are perfect for Easter which is coming up, I thought, couldn't I use them for Valentine's Day? Or for year-round decor? That's when this primer came into my life (Thank you Rustoleum!) The idea is you apply the primer, then apply your spray ... [ Read More ]
DIY White Board (a.k.a. Dry Erase Board)!
This little pantry in our kitchen is used ALL. THE. TIME. It houses soup, pasta, sauces, snacks, you name it. But the outside of the door was looking a little haggard thanks to our resident artist (who's almost 4) and her sticker prowess. Since she loves using that space as an art wall (I can see how she views it as a big white empty canvas), I decided to turn the whole thing into a white board! Here's what I'm starting with, along with the real life mess inside of it! (It desperately needs organizing...) Here are the materials I used (affiliate links are provided): White board wall sticker White board markers/eraser 3M Command Strips IKEA Fiskbo frames (in a variety of sizes) Now for my PSA of the day: take extra care to measure people!!! I'm a math-y and ... [ Read More ]
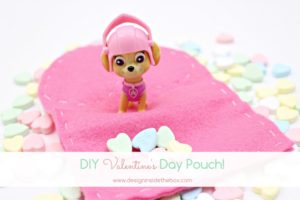
DIY Valentine’s Day Pouch!
Happy Thursday! (Surprised to see me here?!) Today I'm participating in a Valentine's Day blog hop organized by the lovely Jo-Anna from "A Pretty Life in the Suburbs"! (Be sure to check out her gorgeous blog!) Now let's talk Valentine's Day. I find it to be a tricky design holiday. Actually all holidays (except for Christmas and possibly Halloween) are tricky design holidays. You don't want to invest a lot of money on seasonal décor items, but at the same time you want your home to reflect the fun associated with that holiday! (Although if decorating for every holiday is your jam, go forth, purchase and decorate!) With Valentine's Day, I like to go the craft route. You can easily make things, use them, gift them and then put them away! Mine this year involves something you know ... [ Read More ]
DIY Fall Wreath Idea!
This DIY fall wreath idea is inspired by my 3 year old. She loves the book "Chicka Chicka Boom Boom", which tells the story of how the letters of the alphabet tease each other up a coconut tree. When the tree becomes top-heavy, that's when it lowers it's boom and the letters all jumble to the ground - her favourite part! I was looking for a wreath idea for our front door, and as I'm reading this story to my little one, that's when the idea came - a letter-inspired fall wreath! But not your typical monogram wreath. Here are the materials I used: Wreath Forms (Mine were made of straw and varied in size) Wooden Letters Paint Paint Brushes (or Sponge Brushes like above) Ribbon Hot Glue Gun I decided to use three wreath forms in different sizes as I find a door can ... [ Read More ]
Customize Back-to-School Supplies!
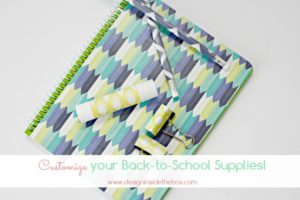
As summer is dwindling and kids are slowly trickling back into schools, stores still have mounds of school supplies on-hand for those last minute shoppers. When I saw what was left (and I overheard a little boy disappointed that some pencils he wanted were sold out) I thought about customizing school supplies - it can be done, right?! Enter these generic school supply items from favourite dollar store: Plain Jane, right?! But I had a plan! Here were my materials: Wrapping Paper Mod Podge Clear Contact Paper Scissors I started with the pencils. I cut a piece of wrapping paper to the size of the pencil and then adhered that to a larger piece of contact paper: I trimmed the ends and began rolling the contact paper/wrapping paper combo onto the pencil. And ... [ Read More ]
Storage Solutions for Small Spaces!
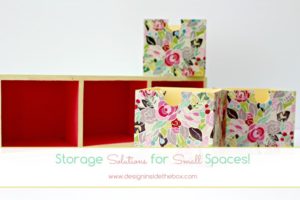
Some people have asked me why my design blog features storage/organizational solutions and crafty things. It's a good question! Here's my take on good design - it goes hand-in-hand with having good organizational solutions for the space that you're designing. And sometimes you have to get creative with how to organize all the things which brings out the crafty side of me! So there you have it - that's why my motto is: Design, Organize, Create! Take these plywood boxes I found at the dollar store: In our guest room/office, I needed some space to house the little things: paper clips, post-it notes etc. When I found these plain plywood boxes, I thought they'd look really great stacked and mounted in an area right by the desk that's out of the way - but they needed a little ... [ Read More ]
“There for the Making” Blog Hop! (Recycle and Reuse what you have!)
This blog hop series makes me happy. It showcases bloggers that recycle, reuse and re-imagine things that they have in their own home into something pretty and useful again - I'm excited to show you what I came up with for this challenge! It all starts with these flush mount fixtures that we have everywhere in our home: While they're not your typical "boob" light, they're pretty plain jane so I've been slowly replacing them all. What I'm left with are these light fixture shades: Looking at their shape, an idea came to mind - want to see what I did?! Ta-da! I turned it into a vase! The light shade is made of glass and it had a milk glass look to it so while I thought I should spray paint it or change up the appearance somehow, it looked lovely as ... [ Read More ]
There for the Making – The Zero Dollar DIY Challenge – February Edition!
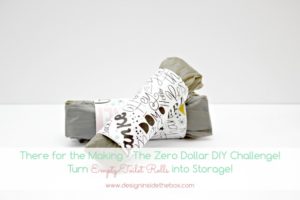
Sarah from 'Flourish & Knot' gathered a great group of bloggers together for a few challenges in 2017, all revolving around DIY solutions that only use materials you have on hand (i.e., you're not allowed to spend any $$$!) February marks our first challenge and I had some work to do to figure out what I already had to solve a few problem areas in our home. I decided to tackle a small area of our pantry that is overrun with plastic bags. Anyone else have this issue?? I thought a reusable fabric bag could hold them all in but this is what it looks like: And more often than not, this is what happens: The solution I used came from a former co-worker of mine (Marc, if you're reading this, I first thought you were nuts but now I think you're a genius!). It ... [ Read More ]
