WE HAVE SNOW!! Ok, right now it's melting, but there are remnants of snow found everywhere here in Ottawa. And with December approaching, this gave us the motivation we needed to tackle our front door and made it a bit more Christmas-y! Our (Almost!) DIY Christmas Outdoor Decor! I'm back with a pack of very creative bloggers for a “Deck the Home Blog Hop” and this week we'll be sharing our take on “Outdoor Christmas Decor”! Keep reading to see my take on this project but be sure to check out all of the creative talent in the link-up below! If you're not inspired to break out the glue gun after perusing their projects, I don't know what it will take ;) For my outdoor decor project, I'm going to be honest, I cheated a bit. Our local grocery store had ready-made wreaths and planter ... [ Read More ]
EasyPress 2 Review (…and my “Dear Santa” Christmas Wall Hanging!)
This is a sponsored conversation written by me on behalf of Cricut. The opinions and text are all mine. But you know me, I'll only consider products I like and (*spoiler alert*) this is one of them! Cricut's line of products includes an EasyPress 2! When I cracked open the box to check it out, I'll be honest, I thought it was just a large iron. But nope! After using it, it's way more than that. I quickly discovered why I stopped making customized t-shirts or customized fabric projects that involved using an iron. It was so frustrating to figure out the heat setting you needed. And what's worse, I never got the pressure or timing right for the transfer to properly adhere to my fabric. This machine actually does the job and I have proof! I gave it a try with fabric that I ... [ Read More ]
Modern DIY Wooden Christmas Wreath!
Christmas. Without a doubt, it is my most favourite time of the year! And while life throws you curveballs (mom is still in the hospital), you look towards the fun times to get you through those rough times. Modern DIY Wooden Christmas Wreath! While I hadn't written in a long while because of mom's health issues, I decided to join some very creative bloggers for a “Deck the Home Blog Hop”! We’ll be sharing a themed Christmas post every week and this week’s theme is “Door Decor”. I’ve shared my project below but be sure to check out all of the creative talent in the link-up below! If you're not inspired to break out the glue gun, I don't know what it will take ;) Now my door decor project, a modern take on a Christmas wreath, changed so many times that I don't have all of the ... [ Read More ]
The smallest change can make the BIGGEST difference!
This truly is the smallest change I could make in our powder room. But it has sparked that Marie Kondo joy when I made it! When Function meets Beauty: The Tale of how a New Soap Dispenser made a HUGE Difference! Sounds ridiculous I know. But when you're in a bathroom, doing your business, generally you don't have any reading material or anything to look at except the bathroom details. That's actually why our powder became the focus of a "One Room Challenge" in the fall of 2017. At that time I had hated the paint colour, the mirror, the lighting, etc. So we did a makeover that transitioned our powder room from being beige to a little ballsy! Now back to our soap dispenser issue. Our Soap Situation - Before A bar of soap in a our powder room didn't work well for us so we ... [ Read More ]
A Design (and Blog!) Direction.
Today. It has been awhile since I've posted! And while I thought about quickly throwing posts together these last few weeks, I hesitated. Every year I make a commitment to myself to post at least once per week, do all the social media bits, nail down a few sponsorships and hope it would all be cohesive. But it isn't. Lately I've been feeling like my blog is splayed between design posts, DIYs, link parties, quick organizing tips, you get the idea. And while I've enjoyed writing these posts, I found myself frantically trying to put something authentic together every week, hoping for that cohesion and, most of all, hoping that my ideas would be inspiring to you. But in doing so, I feel everything has been too rushed. And in some cases, not well thought out or executed. In the ... [ Read More ]
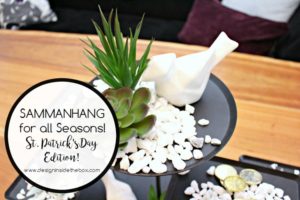
SAMMANHANG for all Seasons – St. Patrick’s Day Edition!
My dining room table centerpiece (using IKEA's SAMMANHANG display stand) has been restyled again to reflect St. Patrick's Day! Well, I should say it's been styled with a HINT of St. Patrick's Day ;) St. Patrick's Day Styling with SAMMANHANG's Display Stand! As a little refresher, here's the $25 display stand I can't stop playing with: Previous Season Styling At Christmas time (when I discovered this glorious stand), I made it into a little Christmas village. Then I rejigged it for Valentine's Day: St. Patrick's Day Styling! So with a slight nod to St. Patrick's Day, here's what my current centerpiece looks like! So when I said slight nod, I meant it! Just a few "lucky" coins adorn the lot and the rest is filled with stones, faux succulents (I can't ... [ Read More ]
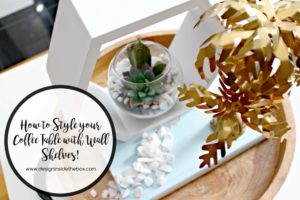
Coffee Table Styling with Wall Shelves!
Does that sound weird?! For a couple of weeks now I've been trying to make a project work with some wall shelves I fell in love with. But when I realized it wasn't to be, I discovered how stylish they could be on my coffee table! How to Style your Coffee Table with Wall Shelves! Now normally my coffee table looks like this: Lots of kiddie toys. But when I'm in the mood for a little adult styling, I clear out the toys and add in a few fun elements. Let's start with my new wall shelves from Jysk! They're thick and have a wide enough base to decorate. I chose faux succulents and various stones and sand to pretty them up. Styling Option #1 See that brass palm tree? I have a confession to make: it's my first thrifted find! I have a few shops I love to buy from that ... [ Read More ]
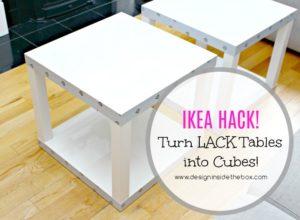
DIY Design Element: Kid-Friendly Coffee Table (IKEA Hack!)
About a year ago I had posted about our kid-friendly coffee table that was actually an IKEA hack. But I had questions asking how to actually do the hack! So today's post will do just that! How to DIY a Kid-Friendly Coffee Table! This post comes at an opportune time as we had originally made these tables almost 5 years ago and now they are in pretty rough shape. Step 1: Get your LACK tables! To make 2 cubes, you'll need 4 sets of LACK tables. The nice thing about IKEA's LACK side tables is that IKEA always has them in stock. The're kind of like bread in a grocery store - they're never out! We used the super shiny white ones. Step 2: Build the side tables as intended Begin building the 2 side tables as per IKEA's instructions (My hubby likes to use power tools to ... [ Read More ]
SAMMANHANG for all Seasons – Valentine’s Day Edition!
I heart IKEA. And I heart all of their new collections with my favorite called SAMMANHANG! I fell in love with their display stand in December and I've been styling it ever since! Valentine's Day Styling with SAMMANHANG's Display Stand! Here is the display stand I've been ga-ga over: Isn't she beautiful?! And she doesn't break the bank - it's only $24.99 folks! SAMMANHANG Display Stand - Christmas Styling In December I turned the display stand into a little Christmas village. Our kiddo loved it! SAMMANHANG Display Stand - Valentine's Day Styling When we took down our Christmas decor, I was going to pack up our display stand but I found that hard to do. There were so many possibilities to style it! So I decided to style it for every occasion, with the next ... [ Read More ]
How to Make a DIY Lego Table!
Lego. Some parents cringe at that word, others LOVE Lego but one thing's for sure, every kids room has some! When I participated in last year's spring "One Room Challenge", I re-did my daughter's room but I ran out of time in putting some of my ideas into action. This DIY Lego table is one of them! In the original room design, the one little table at the end was to be transformed into a Lego table but it remained as it was because of my poor planning! But not anymore! A DIY Lego Table Step 1: Gather your materials! There are lots of tutorials on how to make Lego tables using Lego baseplates but those work well with square or rectangular shaped tables. In my case, the shape of this little table is more like an oval and cutting rigid baseplates would be difficult. ... [ Read More ]
- 1
- 2
- 3
- …
- 8
- Next Page »


